
Introduction: Drawing Regular Polygons


Many years ago when I was at school (about 1975) I was shown how to draw regular polygons in Technical Drawing Class
I'm not sure if this is still taught in these days of computers so here goes
The drawing equipment I was using was a bit ancient and infirm (a little like myself) plus I was doing the drawing on my lap with a dog nuzzling me, so the accuracy is a little off
Using a decent compass and a table would probably make this much more accurate :-)
Supplies
Compass
Pencil
Ruler
Step 1: Baseline

Draw a baseline the length of one side of your desired polygon (I have used 40mm here)
Step 2: Find Baseline Centre


Subdivide the line either by measuring or, as I have, using the arcs drawn with a compass from each end
Step 3: Draw Perpendicular

Draw a line perpendicular to the first (this is where the subdivide using a compass comes in handy) by drawing through the 2 compass arc crossover points for a perpendicular
Step 4: Draw Arcs


Place the compass point at one end of the baseline, draw an arc the length of the side of the polygon (in this case 40mm) from other end to intersect the perpendicular
Place the compass point in the centre of the baseline, draw a second arc half the length of the side of the polygon (in this case 20mm) from the centre of the base to intersect the perpendicular
These will give you the centres for circles to draw a 6 sided (hexagon) or 4 sided (square) polygon
Step 5: Label

Label these 2 points as 6 and 4, (you don't have to do this, I have for clarity)
Step 6: Subdivide the Space Between Point 4 and 6


Again I subdivided using drawn compass arcs, but easy enough to just measure the distance between points 4 and 6 with a ruler and mark halfway, mark this as point 5
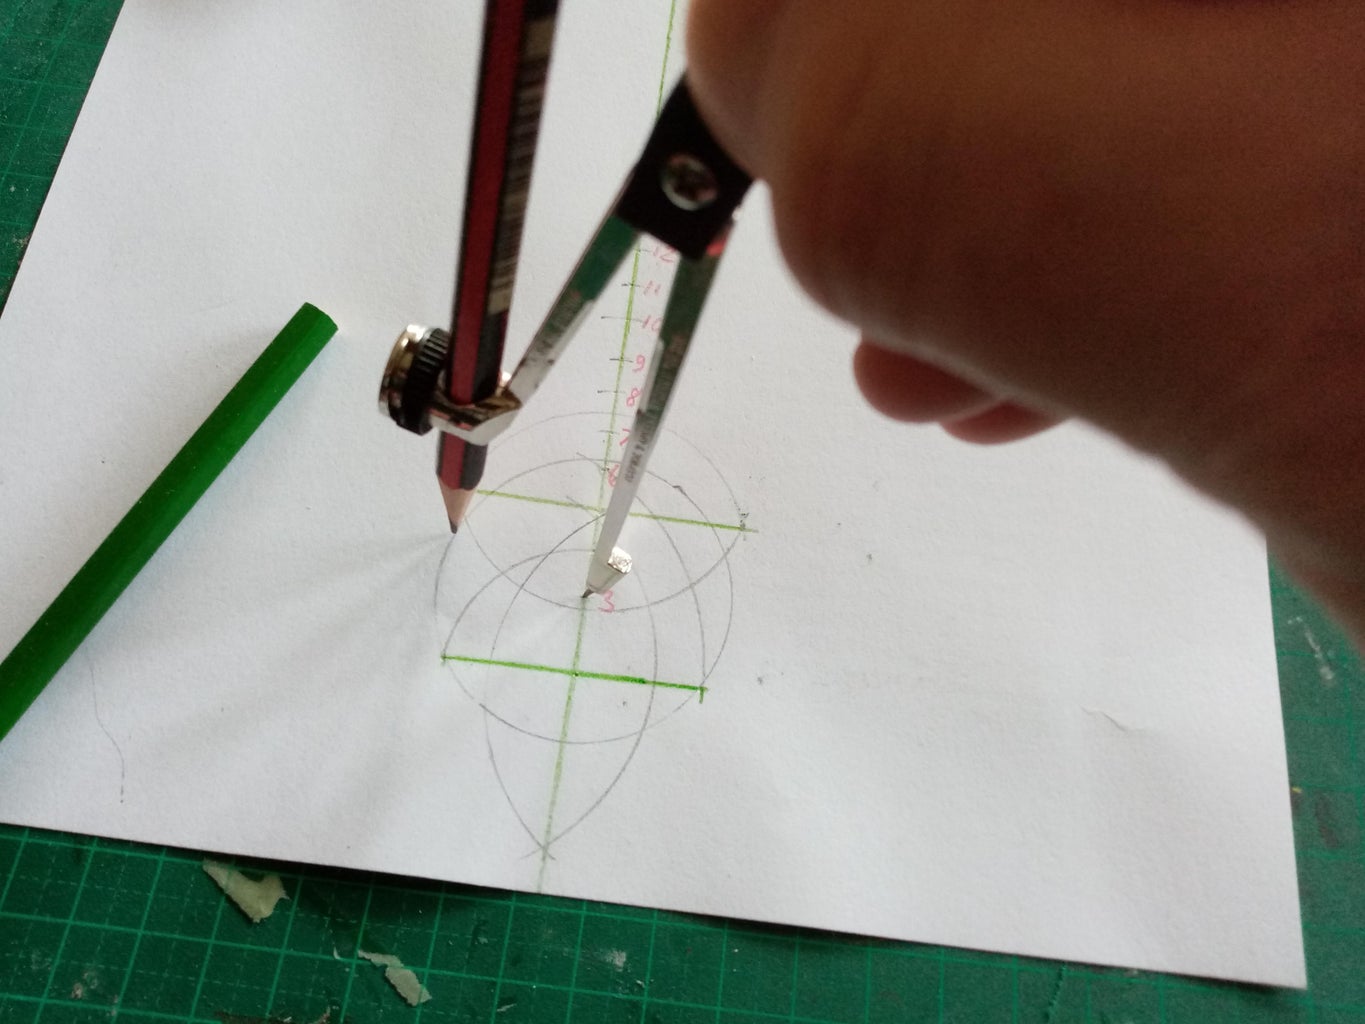
Step 7: Use Compass, Dividers or Ruler to Mark Off Subsequent Points


I set the compass to a distance between points 4 and 6 and then stepped off along the perpendicular line to give points 8,10,12 etc, then using the same distance stepped off from point 5 to give points 3,7,9,11 etc. Again you can just use a ruler for this.
I then numbered all the points, just for clarification on this 'ible
Step 8: Laying Out for the Polygons (Triangle First)
Place the point of your compass on the number corresponding to the number of sides of the polygon you want to draw, in the first picture I have it on the 3 to draw a triangle
Open up the compass so that pencil is at one end of the baseline, draw a circle
Open up the compass to the length of the baseline (in this case 40mm) and with the compass on one end of the baseline, strike an arc to intersect the circle (in this case it will be at point 6 on the perpendicular)
Draw a line from each end of the baseline to this point and you have an equilateral triangle.
Step 9: Laying Out (Square)


In this case put the compass point at Point 4
Open up the compass so that pencil is at one end of the baseline, draw another circle
Open up the compass to the length of the baseline (in this case 40mm) and with the compass on one end of the baseline, strike an arc to intersect the circle
Step out the 40mm baseline around the circle and "join the dots" for a square
Step 10: Carry on for Subsequent Points


Carry on in the same manner for subsequent points, first picture shows 5 sided (Pentagon),6 sided (Hexagon),7 sided (Heptagon) - I've called it a Septagon because that's what they were called when I went to school!!!
Second picture is a continuation with Hexagon, Nonagon and Decagon, in theory you can go as high as you want.


18 Comments
1 day ago
Wow do I feel old. I opted for T.D (Technical Drawing) for my last two years at school, instead of Computer Science. Well it was obvious computers where just a passing fad. Love your drawing.
Reply 7 minutes ago
Thank you, I have a couple of other "old timer" tricks that I'll 'ible when I get a chance
10 hours ago
My dad just handed my grandfathers compass this summer. I have been thinking on how to show my daughter how to use it. This is a perfect project! Thank you for sharing this with everyone.
Reply 8 minutes ago
How cool that it has been passed down, I have a couple of other little tricks that I will 'ible when I get a chance so stay posted, and enjoy 😊
1 day ago
hi! nice, very nice; just one observation; in the progression of the regular figures, the second hexagon is an octagon
Arnaldo
Reply 21 hours ago
Well spotted that man! Take any prize from the top shelf. I hadn't noticed.
Reply 18 hours ago
;-) it is the Greek numeration, I am Italian and I received a classical education..
Reply 6 hours ago
I am English and occasionally attended school
1 day ago
Unfortunately it is impossible to construct an accurate heptagon using only a compass and a straight edge. See https://en.wikipedia.org/wiki/Constructible_polygo...
"A regular n-gon can be constructed with compass and straightedge if and only ifn is a power of 2 or the product of a power of 2 and any number of distinct Fermat primes."
Reply 21 hours ago
It's a what, what? I'm far too dumb for that😊, as we say in my line of work (shipwright) it's good enough for a government job.
Reply 14 hours ago
The bottom line is that you can accurately draw, with only a straight edge and a compass, 3,4,5,17,257 & 65537(!) sided polygons, their products such as 12,15 and 20 and those with 2,4,8 etc times that number of sides. You cannot draw 7,9,11,13, 14,18 etc. (Note, the products can only contain 1 of each number, so 3X3 is forbidden)
There are constructs that draw an approximation. I found one that claims to give a heptagon to within 2% for example. But they are not rigorously accurate.
If you allow other drawing tools, such as an angle trisector, then a nonagon (9 sided) is possible. See https://en.wikipedia.org/wiki/Angle_trisection#Proof_of_impossibility
1 day ago
Thank you so much for this. I was never very good at math and struggle to draw shapes for quiltmaking. Very helpful!
Reply 21 hours ago
You're welcome
1 day ago
Thank you for your contribution. Sorry, but maybe I'm doing the trigonometry wrong since it seems this method is only an approximation. This method is only exactly accurate for 4-sided and 6-sided polygons. One can show that, if the chord length is exactly 2, then the height of the circle's center above the lowest chord is cotangent(pi/n). This does not equal what this method gets except for n=4 and n=6 (where the heights are 1.0 and sqrt(3), respectively). All in all one does get pretty close with this method. If you want your brain to hurt look at Richmond's Method and Carlyle Circles in the 'Pentagon' article at wikipedia.com. They're just doing regular pentagons. This method although not perfect gets a pretty good picture quickly.
Reply 21 hours ago
Thanks, I can make my brain hurt more than adequately without a maths book.
I was taught this in the 70s in tech drawing class (thanks Mr Bissett) never knew it wasn't exact, still good enough for woodworking
5 weeks ago
Takes me back to my Draughtsman days, before computers. :)
Reply 5 weeks ago
Just wish I had a better compass, still the principle is there. I'm pretty sure no one teaches this anymore
Reply 1 day ago
Right. I used to do this kind of thing when I was a kid. Now if I need a regular n-gon as a template for some project I print it out from either mathematica or adobe illustrator.