
Introduction: Clock - Rock Around - 3D Printed


"We're gonna rock around the clock tonight!" A line of the lyrics from the 1955 song sung by Bill Haley. A nice motto when you look at your clock!
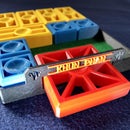
If you know 3D printing, then this clock is easy to create. It consists of only 4 print files and - of course - a clock movement and hands.
Due to the 4 individual parts - in what concerns the color design - a variety of compositions is possible.
The clock is for mounting on the wall.
In order to show off the yellow font well, a dark background should be chosen.
Dimensions:
Ø 190 x 26mm
Supplies
For this project you will need:
- clock_text.stl
- clock_case.stl
- clock_cover.stl
- clock_picture.stl
- a clockwork
- clock hands
- (super) glue
- spanner (10mm).
A movement with the red hands you can find here:
www.amazon.de/gp/product/B08LQDR348/ref=ppx_yo_dt_b_asin_title_o00_s00?ie=UTF8&psc=1
It includes 2 movements and 3 sets of hands. I chose the red clock hands because they have a suitable size and stand out quite well against the black dial.
There are also white hands in this set, which stand out even better against the black dial. However, they are too long and would have to be shortened.
The two movements have different shaft lengths. For this clock, the movement with the short shaft length (16 mm) should be used.
Step 1: Printing


Print Settings:
- Printer brands: Prusa, Flashforge
- Printer: i3 MK3S, Prusa Mini, Flashforge Finder
- Supports: No
- Resolution: 0,2
- Infill: 10%
- Filament brand: Prusa, ICE
- Filament color: Galaxy Black; Young Yellow, Wintershine White
- Filament material: PLA
Remark: As all parts are designed to fit very precisely, it may happen that you have to rework one or the other part a bit with sandpaper and/or cutter due to different dimensional accuracy of the printers and the different behavior of the filaments.
Attachments


Step 2: Assemble Parts


After the 4 parts are printed, you can start assembling them.
For this step you need:
- clock_text.stl
- clock_case.stl
- clock_cover.stl
- clock_picture.stl
- (super) glue
First, start by gluing "cover.stl" into the inside of "case.stl". Make sure that the openings are covered exactly. Then set some small glue dots and press the cover firmly against the inside for a few seconds. The cover serves to better highlight the hour division from the front side.
Next, glue "clock_picture.stl" to the front of "clock_case.stl" with some superglue. Make sure that you align the picture correctly. As a reference point you have the small cutout on "lamp_case.stl". It means "on top"!
At last, place the text ring upside down around the case. Align the text ring so that the small mark sits between the R and the O of the word ROCK.
Step 3: Installation Movement


For the installation you need:
- the assembled printed parts
- a clockwork
- clock hands
- battery (AA 1.5V)
- a small spanner (10mm)
Proceed as follows:
- insert the "hook"
- put the plastic washer on it (it should prevent the clockwork from rotating)
- insert the thread of the movement through the hole in the case from behind.
- screw the nut onto the thread.
- tighten the nut with a spanner (10mm). When tightening the screw, make sure that the movement hanger is aligned with the small recess.
- insert the hour hand (press the hour hand on the axis - starting from the current time - to the next full hour and the minute hand to the 12).
- then the minute hand.
- and finally the second hand.
Insert the battery (AA 1.5V).
Let the hands turn and check that they pass each other at the right height.
If they touch, you have to "bend" them carefully into the right position.
Now set the clock by turning the minute hand.
Step 4: Color Suggestions


You may want to make this clock in other colors. Here are some examples.
Have fun with this clock!

Participated in the
Clocks Contest


Comments