
Introduction: Stretchy Elastic Stitched Neck Choker and Bracelets
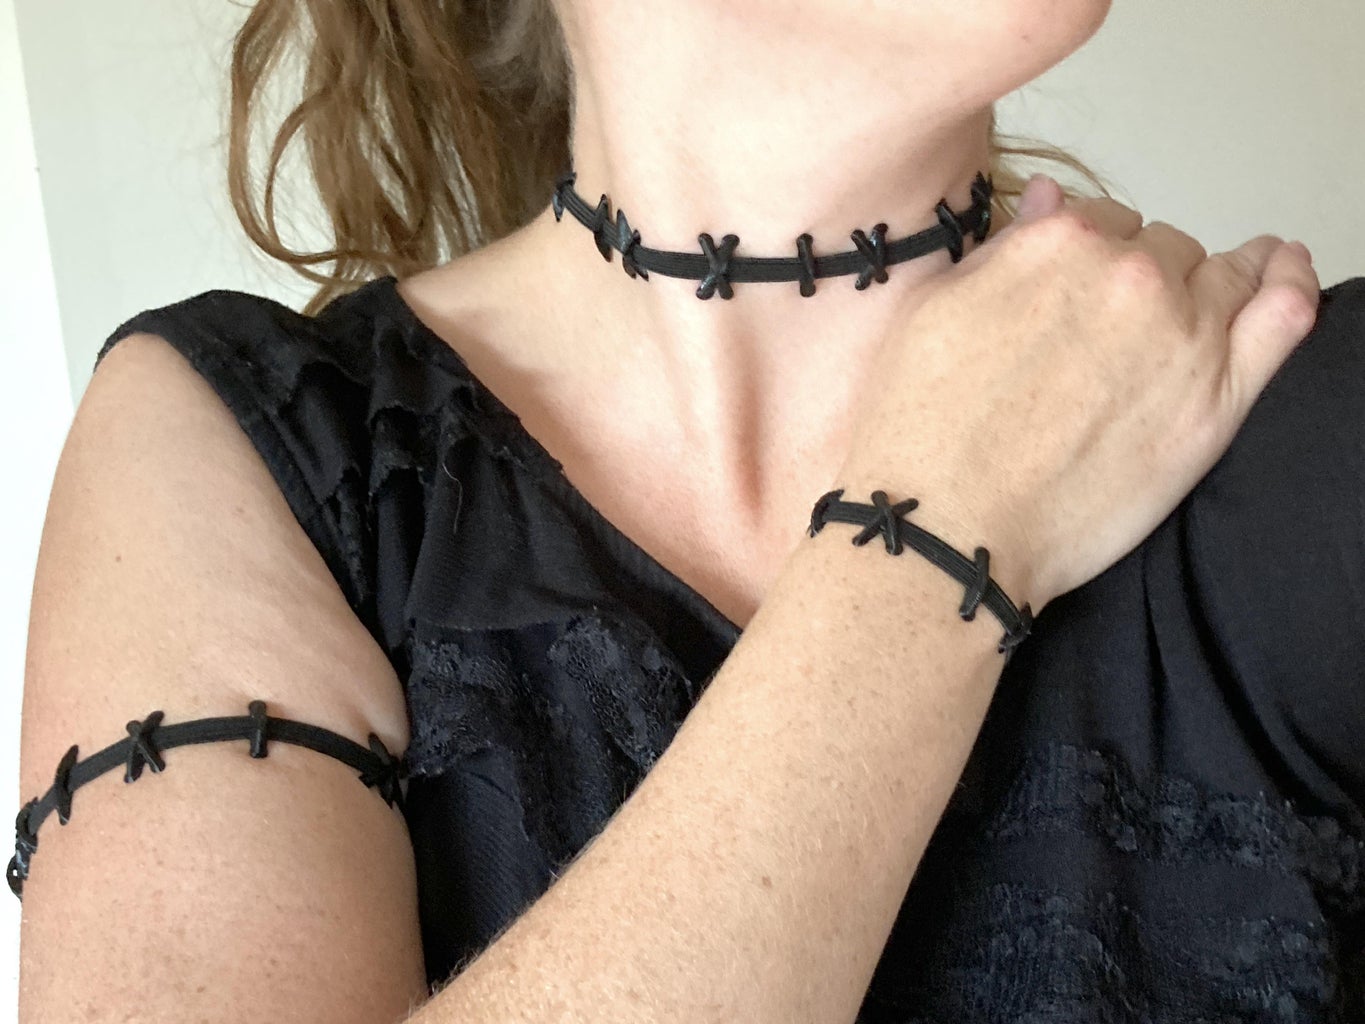


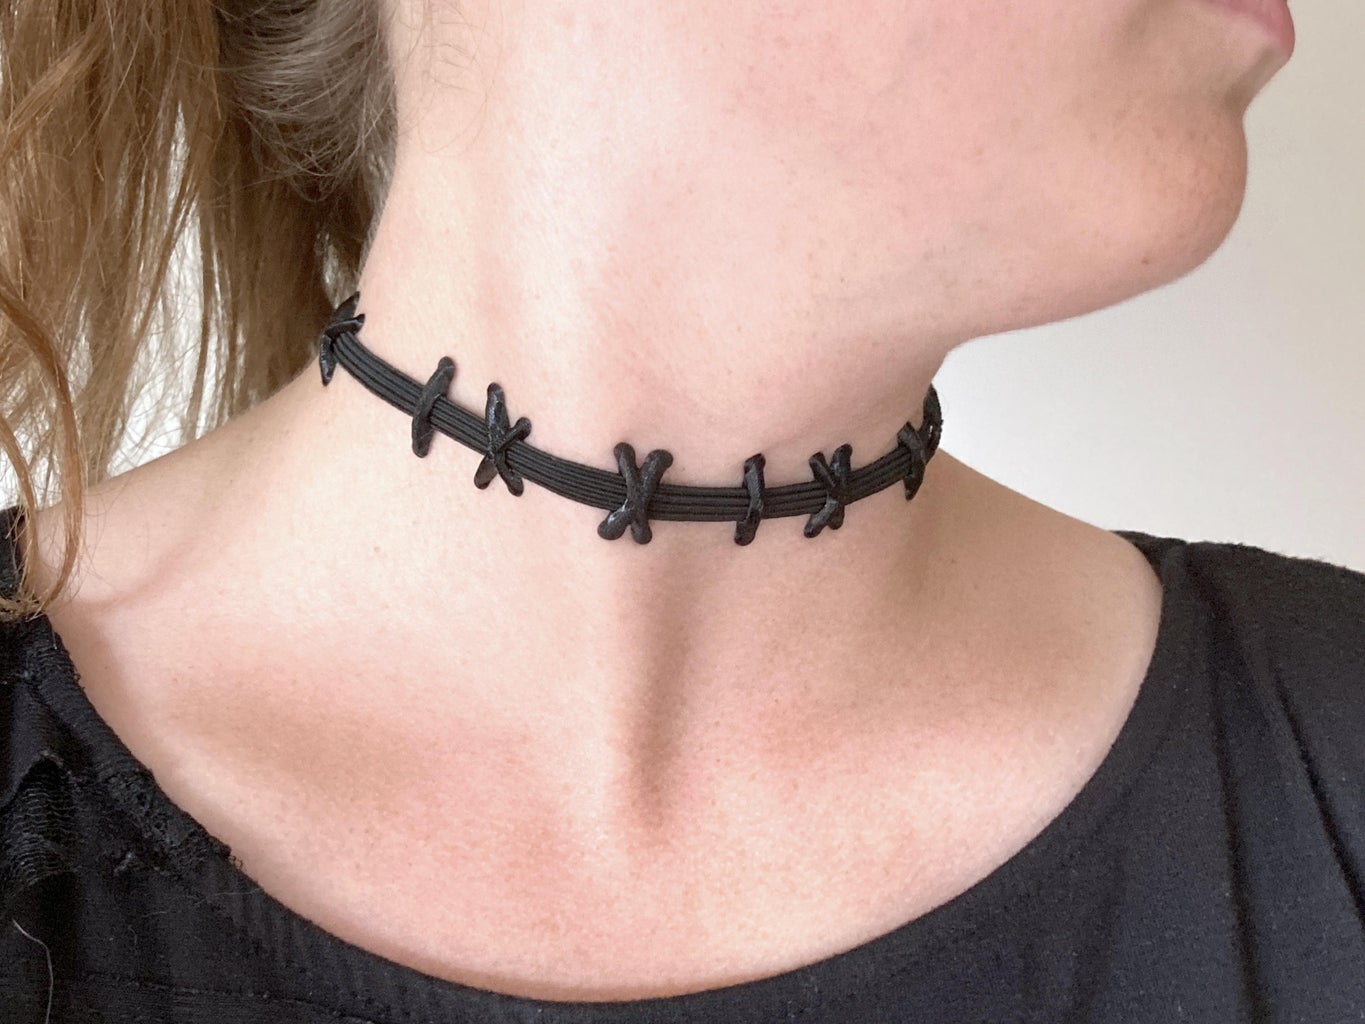
Years ago, I created a 3D printed stitched neck choker with the idea of making a thin print that was flexible. It evolved to using flexible TPU filament to allow for a more comfortable fit and more durable finished choker.
Over time, I'd been asked about making it flexible or without metal clasps/chains (for those who have metal allergies) and my tests never panned out because I would add just a couple inches of elastic and it wouldn't be enough to get over my head. I left it alone for a while, but when I was recently revisiting it and trying to decide how I could give it enough stretch, I thought I would try making the stitches into "beads" that would just slide onto an elastic base instead of having the base of it be 3D printed. I gave it a try and it actually all came together fairly easily and I'm very happy with the results!
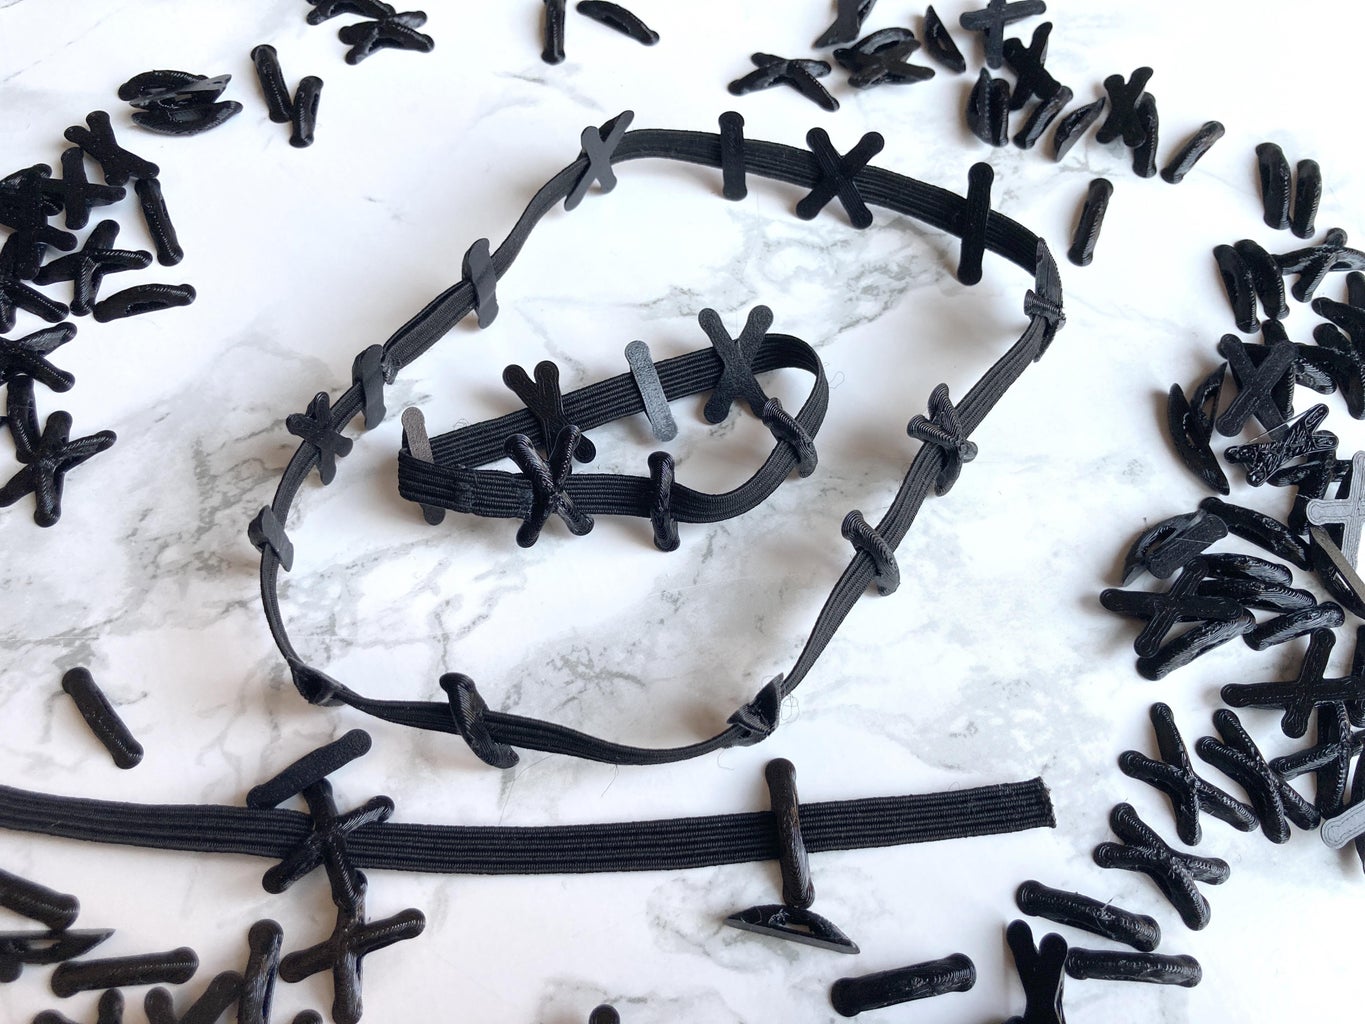
This stitched neck choker, armband, and bracelet design is more "costume-y" than my previous version but I think they also work really well and since there is no clasp, it has a lot more seamless look making it feel more "real" for your Sally Nightmare Before Christmas cosplay or Frankenstein's Monster or Monster High, or whatever costume you're looking to create.
Instructable 382
 Check out my shop on Etsy! You can also purchase this choker, armband, or bracelet in my Etsy shop.
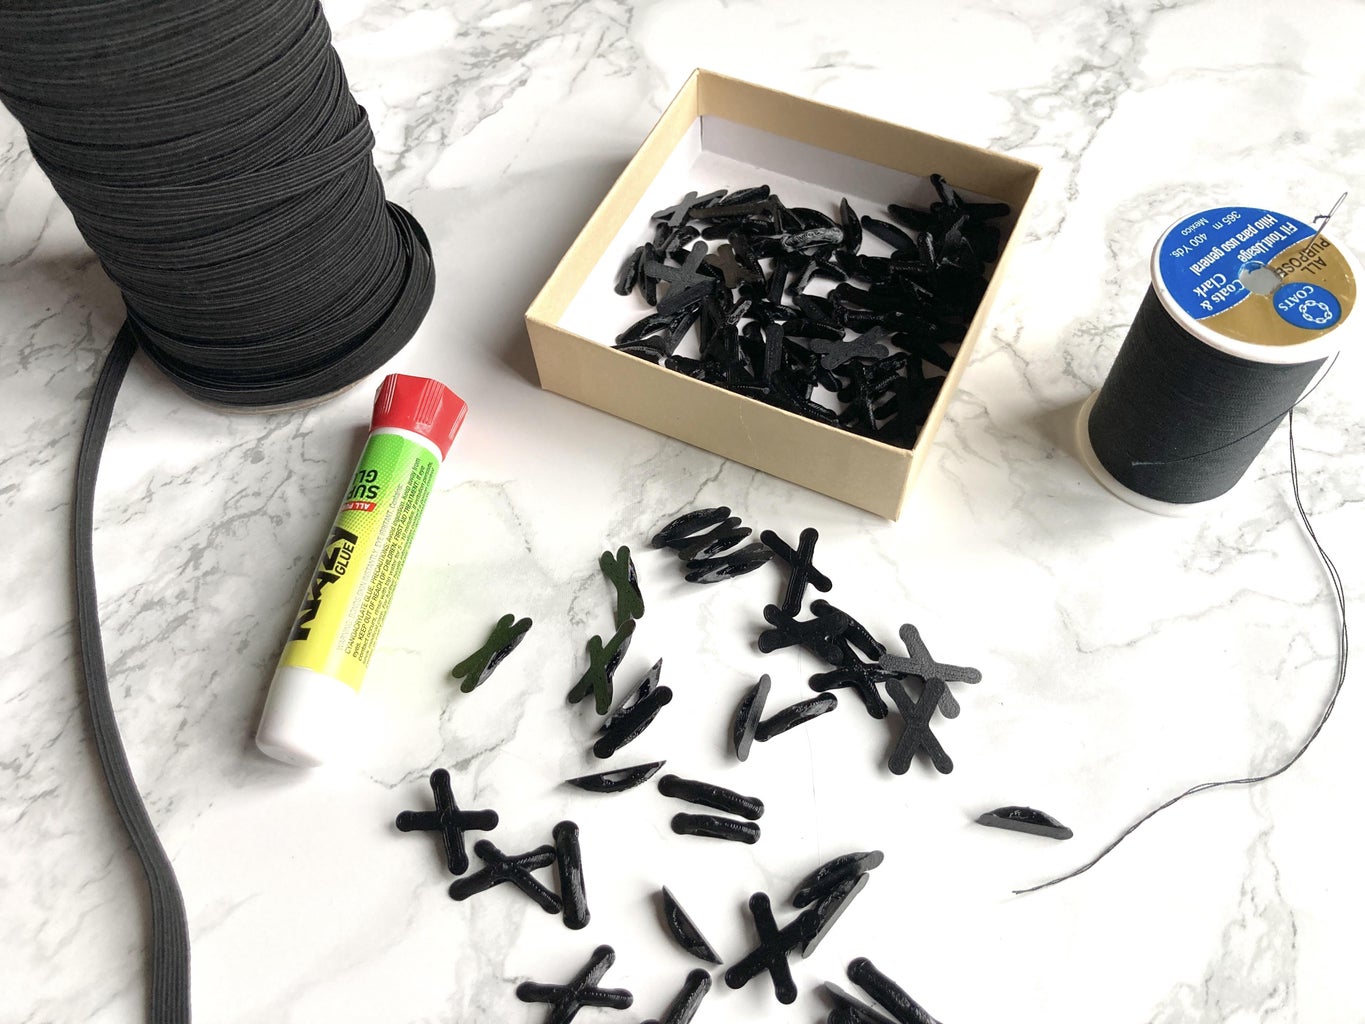
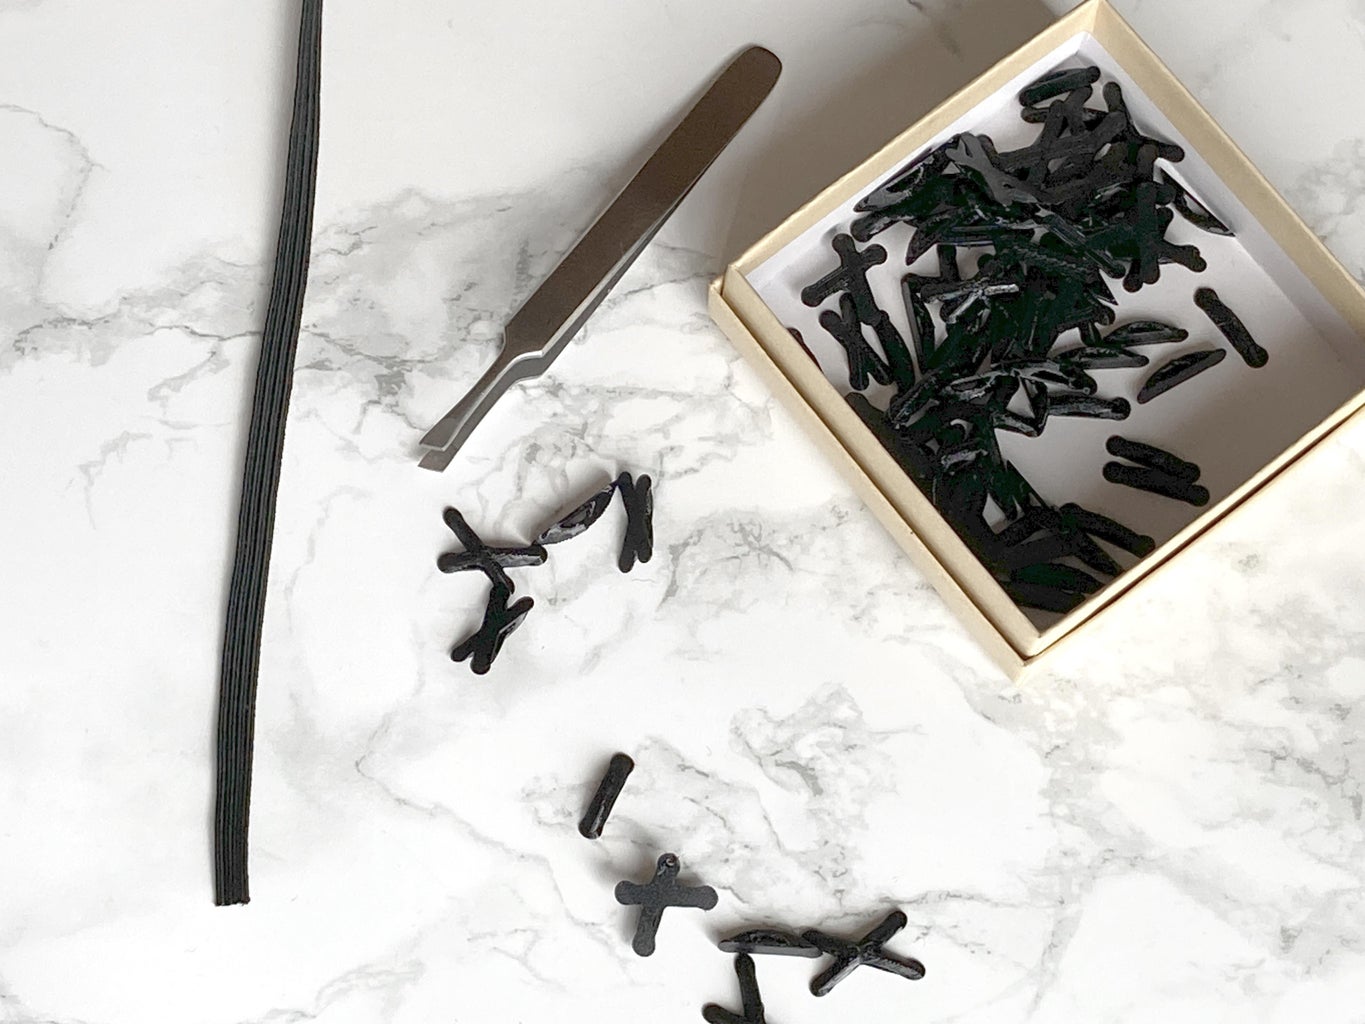
Supplies
- Tinkercad
- 3D Printer - I'm using a Bambu X1 Carbon
- 1/4" Black Elastic
- Needle
- Thread
- Super Glue or Fray Check - I prefer super glue as it doesn't leave residue
*Any Amazon links are Amazon Associates Links
Step 1: Tinkercad Design
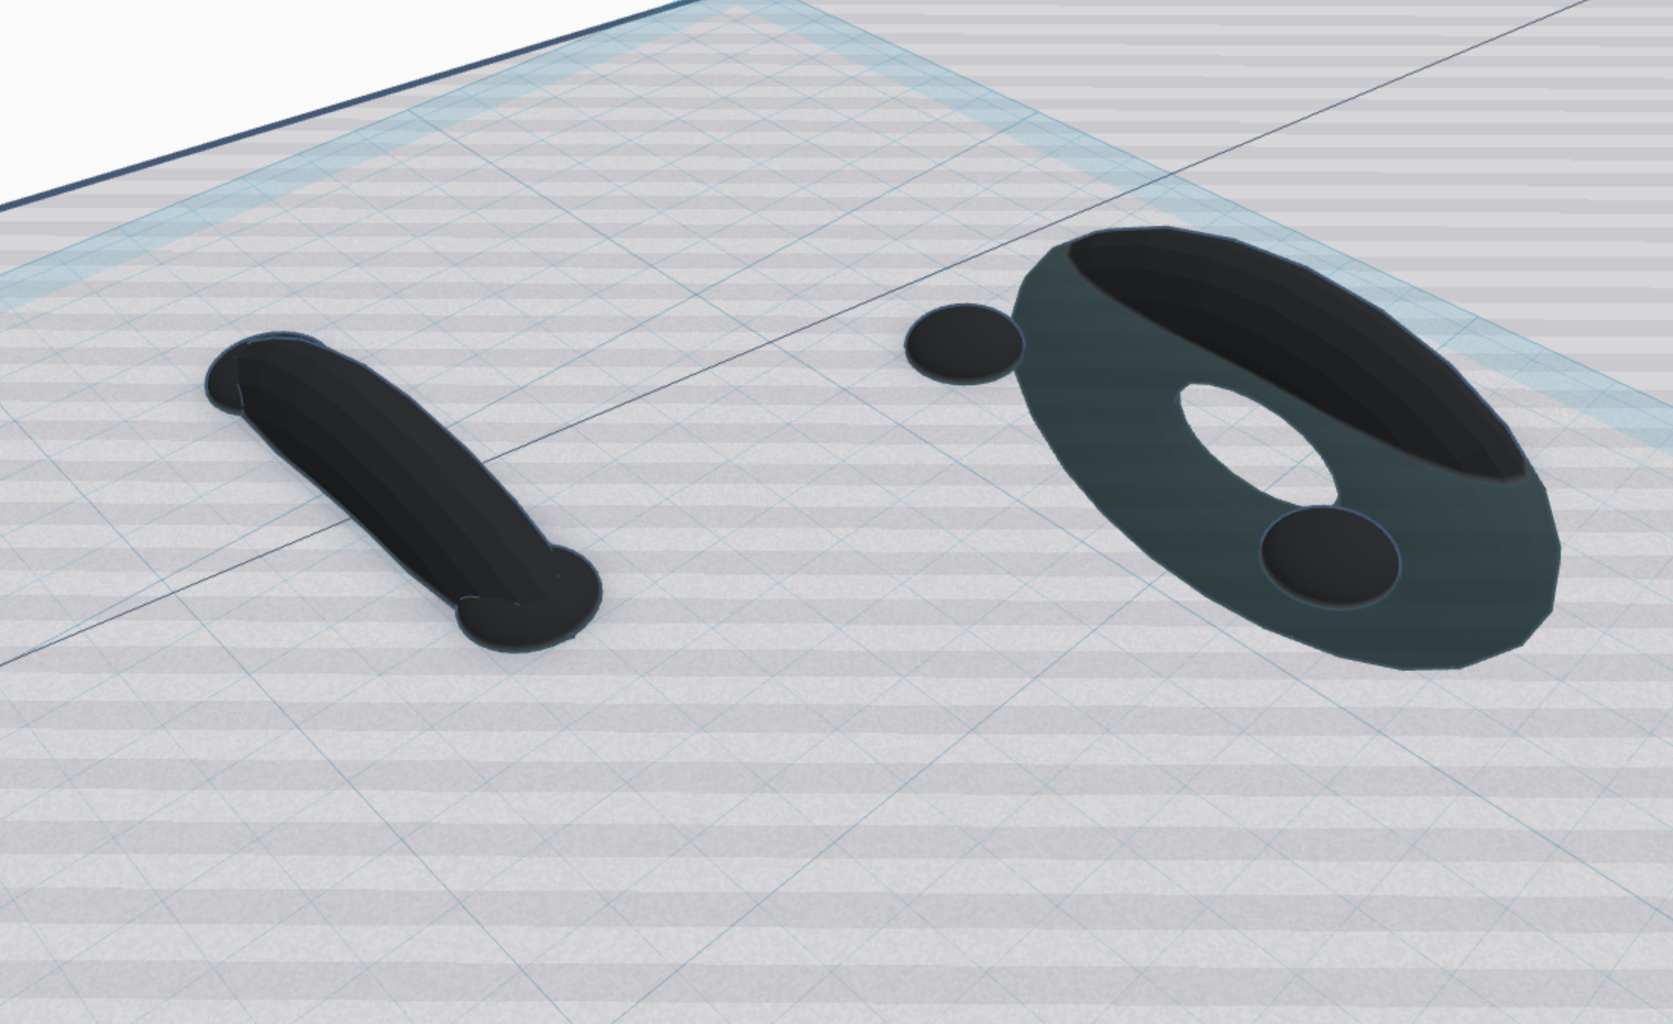


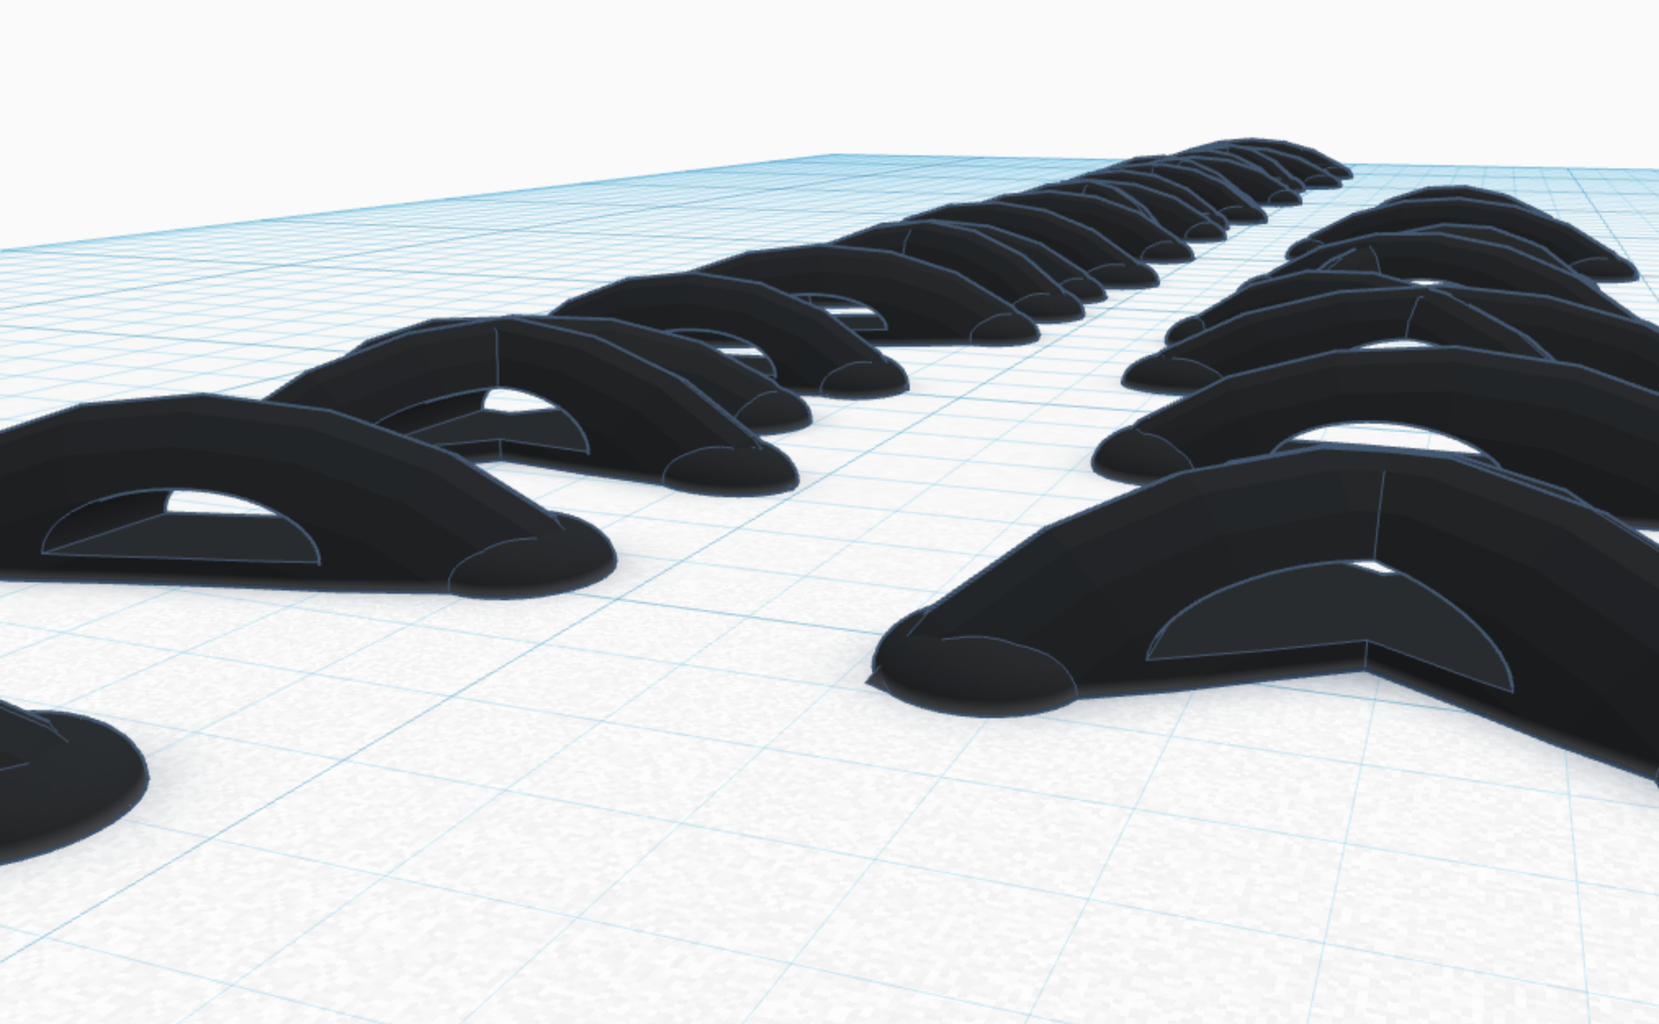

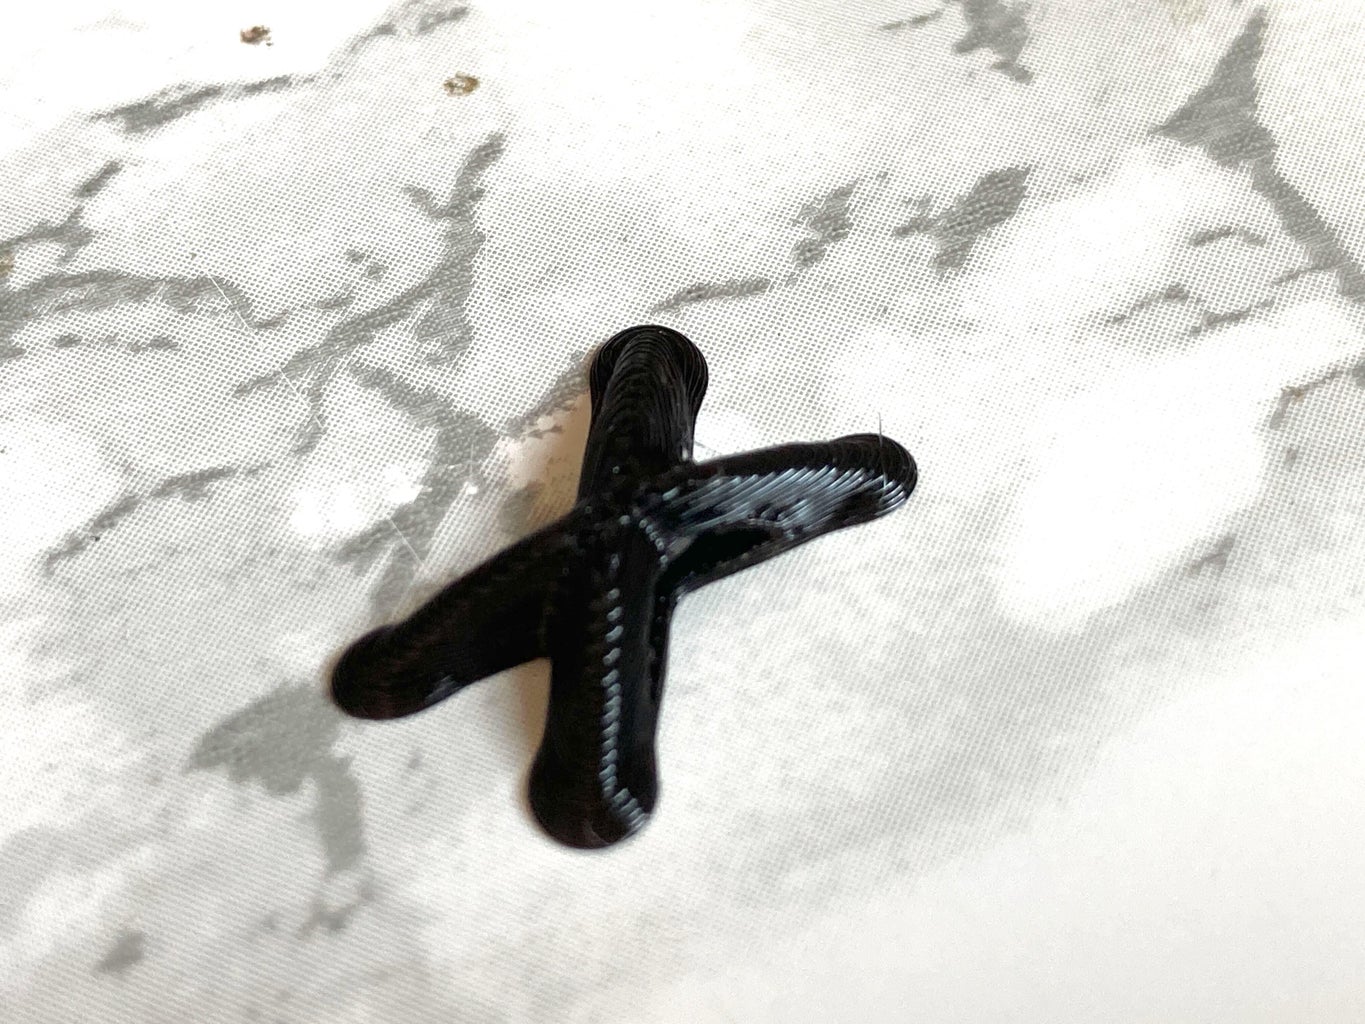
I started with the stitches from my previous stitched neck choker which are made up of a Torus and two Half Spheres.
I took the stitches and used the base of the original necklace (which was a long smooshed cylinder cut in half) to cut the hole in the beads (I did some tests to decide this was a good fit for both holding the stitches in place while also allowing me to thread them on the elastic).


Step 2: Printing and Cleaning
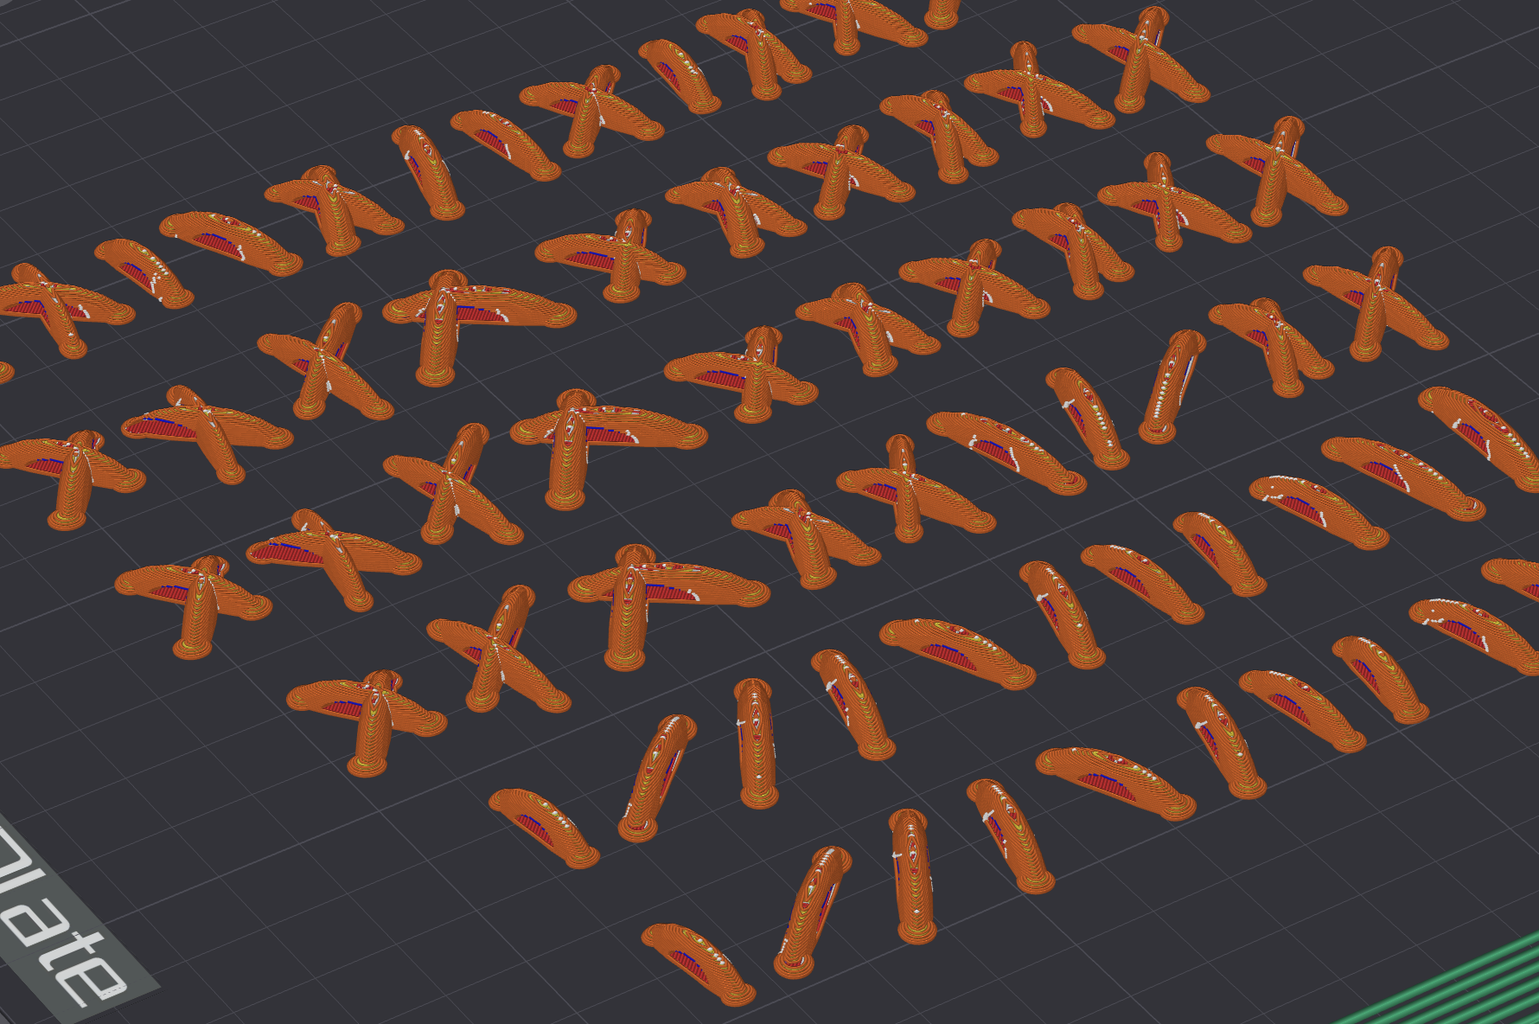


I didn't really do anything special for printing them besides trying to make sure my TPU settings were all dialed in.
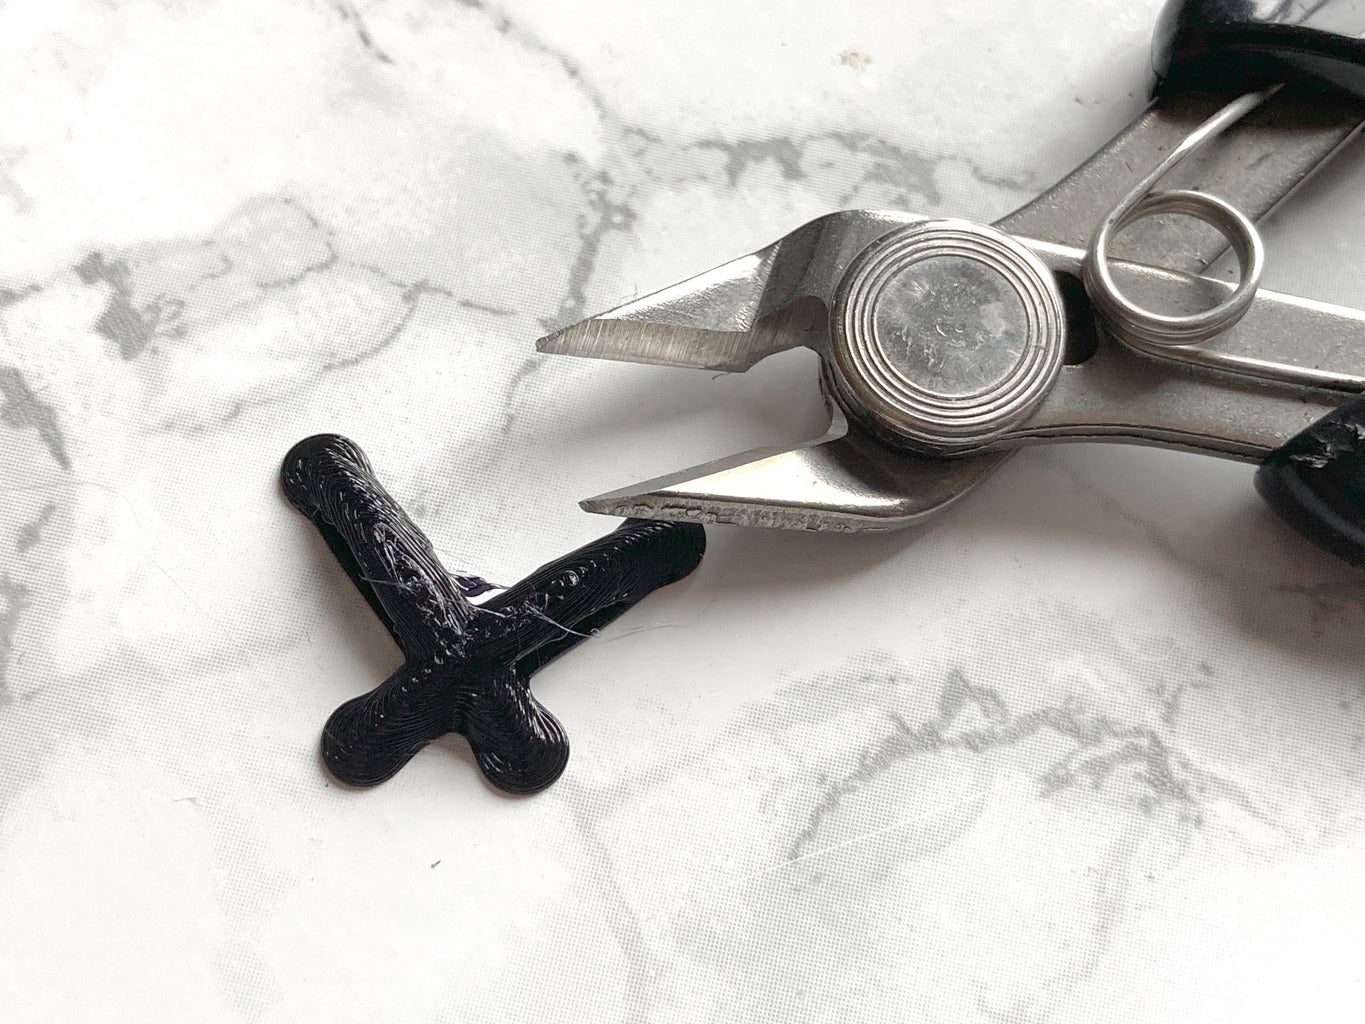
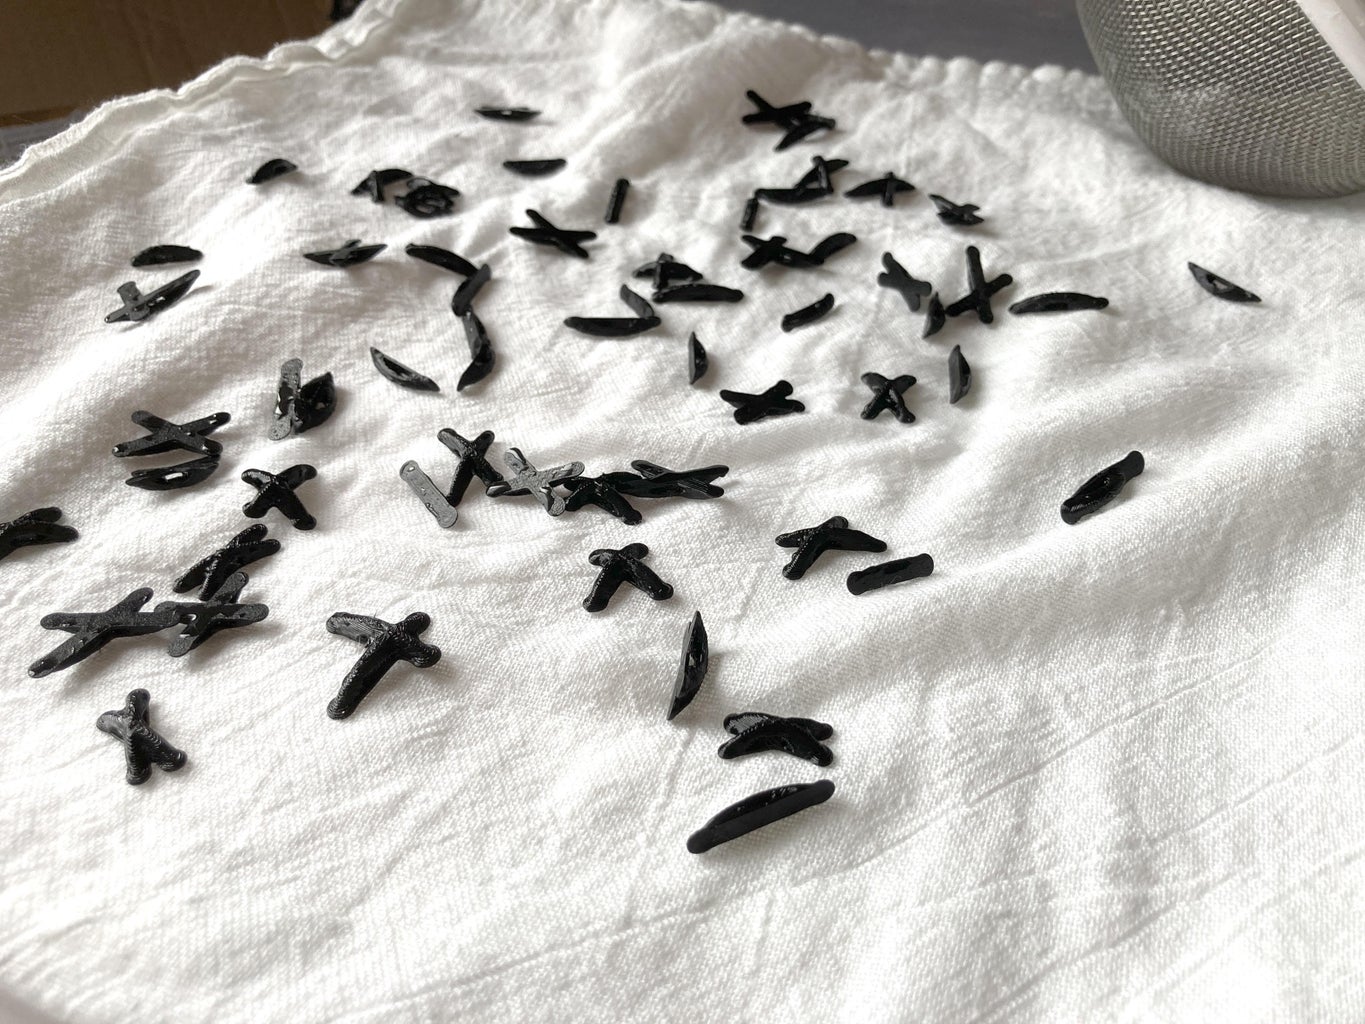
I scraped them pretty easily off with a 3D printed scrapper and trimmed any blemishes off with a flush cutter. I cleaned them up afterwards since glue is used as a release agent on the bed, and put them in a sieve so they wouldn't go down the drain. I made sure to leave them to dry before making them into jewelry.
Step 3: Glue the Ends


While my stitches dried, I cut my elastic to size.
You can either cut them to size or cut them about 1/4" short. You will lose about 1/4" when you sew so keep that in mind as well when deciding how much to cut.
I put a little super glue on the ends so they wouldn't frey. I used frey check originally but I found the super glue held up better after threading them through all the stitches and didn't discolor them as much as the fray check left white residue.
Make sure they are dry before moving on so you don't stick your fingers together or make a mess.
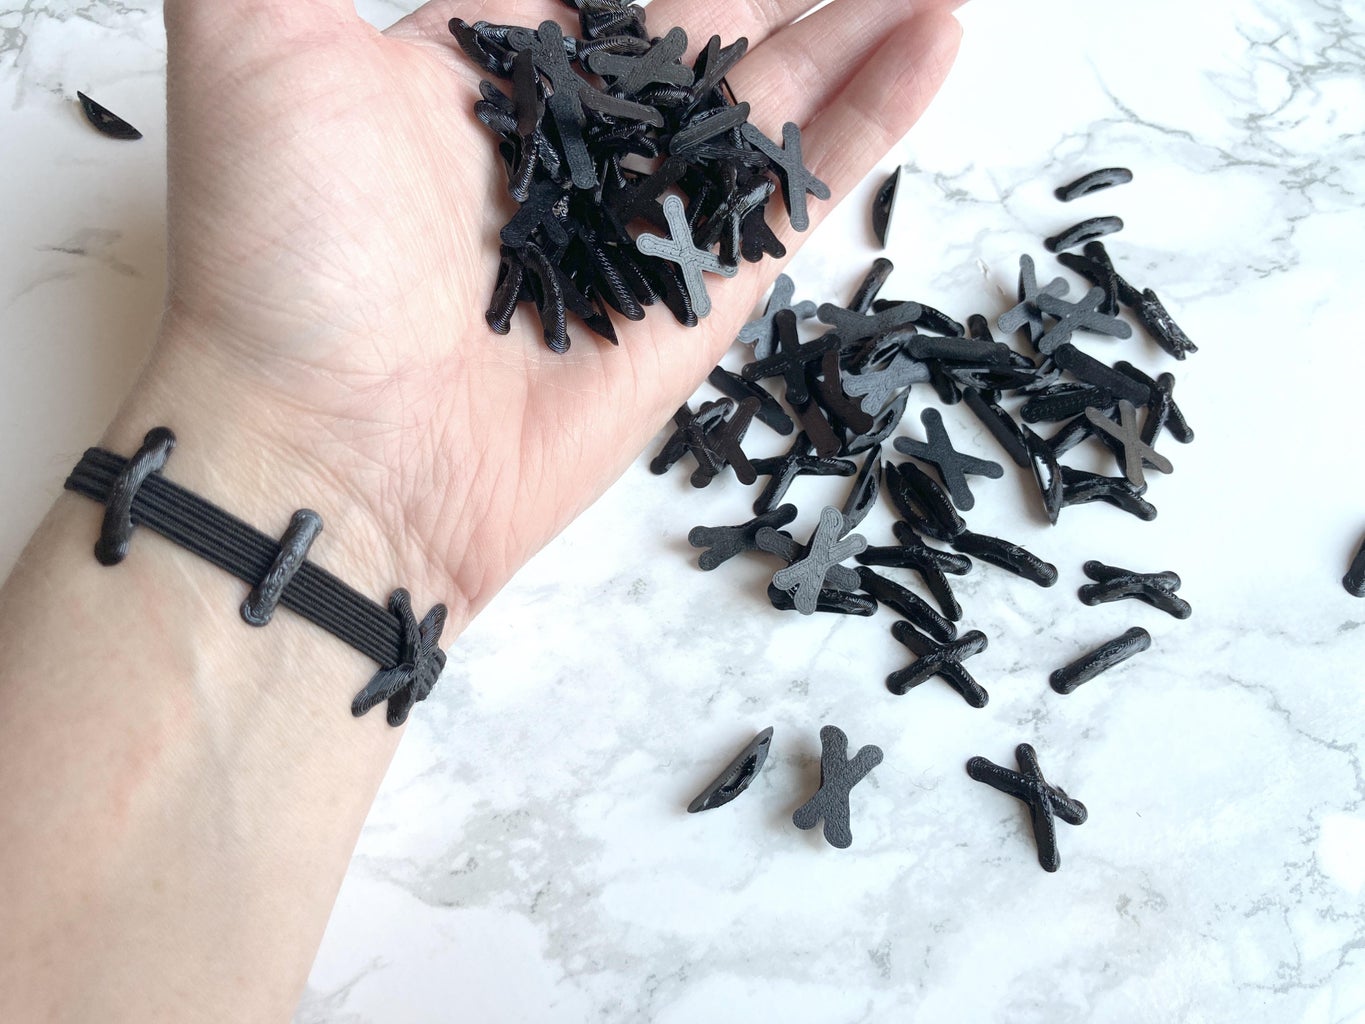
Step 4: Thread on Stitches
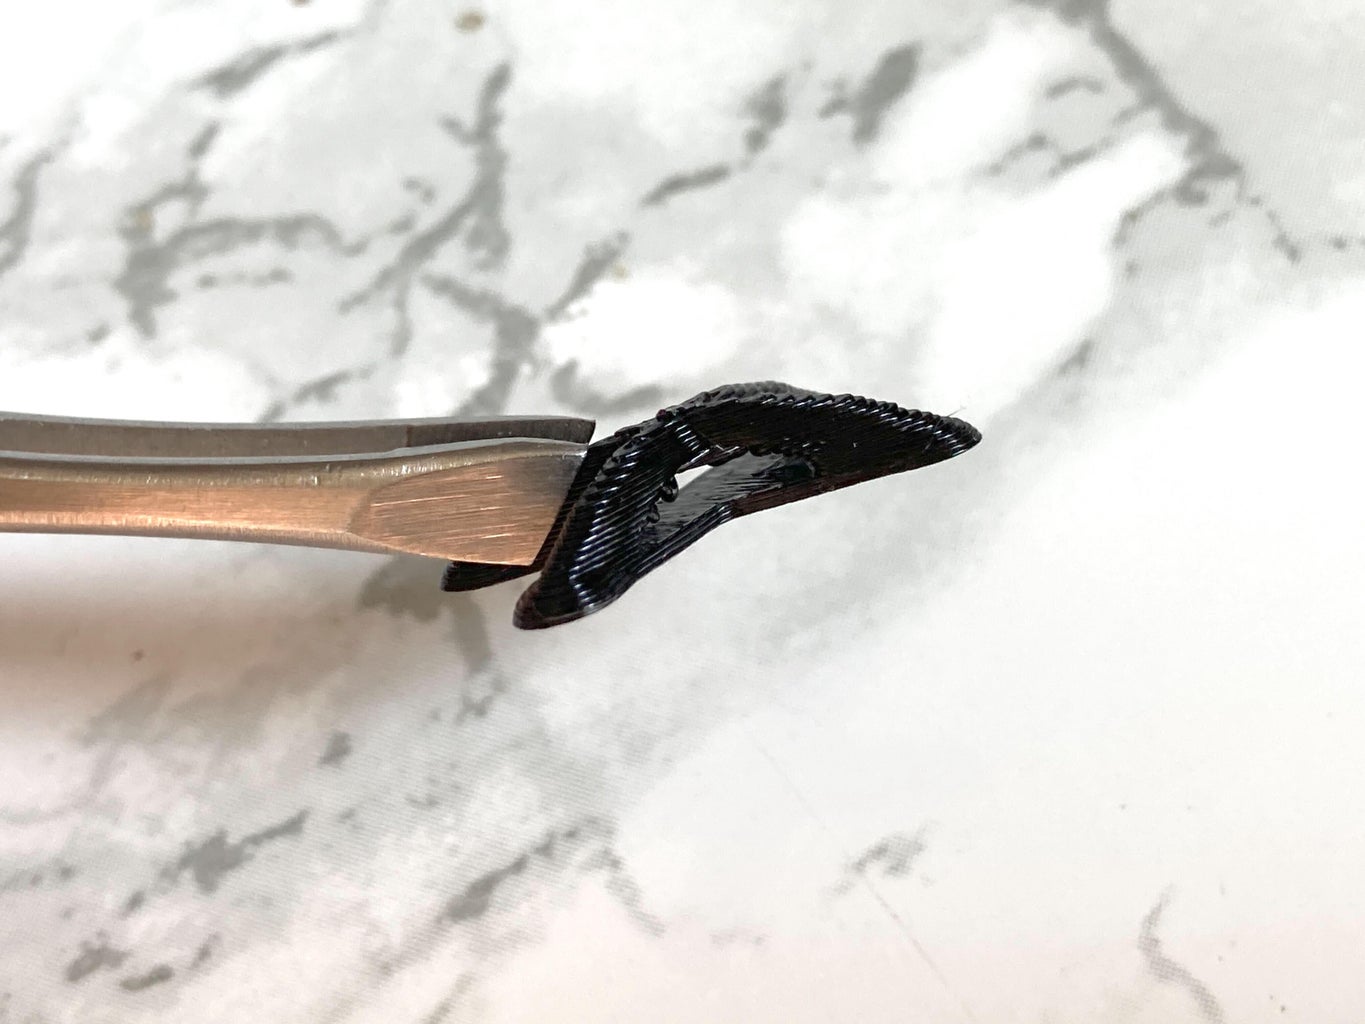


Now to thread on your stitch "beads."
I found that it helped to have a tool that helped shove the elastic through the bead. I used a tweezers.
Then, once it was starting to stick out the other side, I would grab it would the tweezers and tug it through.
I put on about 1 stitch per inch + 1. So for a 17" choker I'd put on 18.
I made a little video to try to show what I'm doing better.
Step 5: Sew

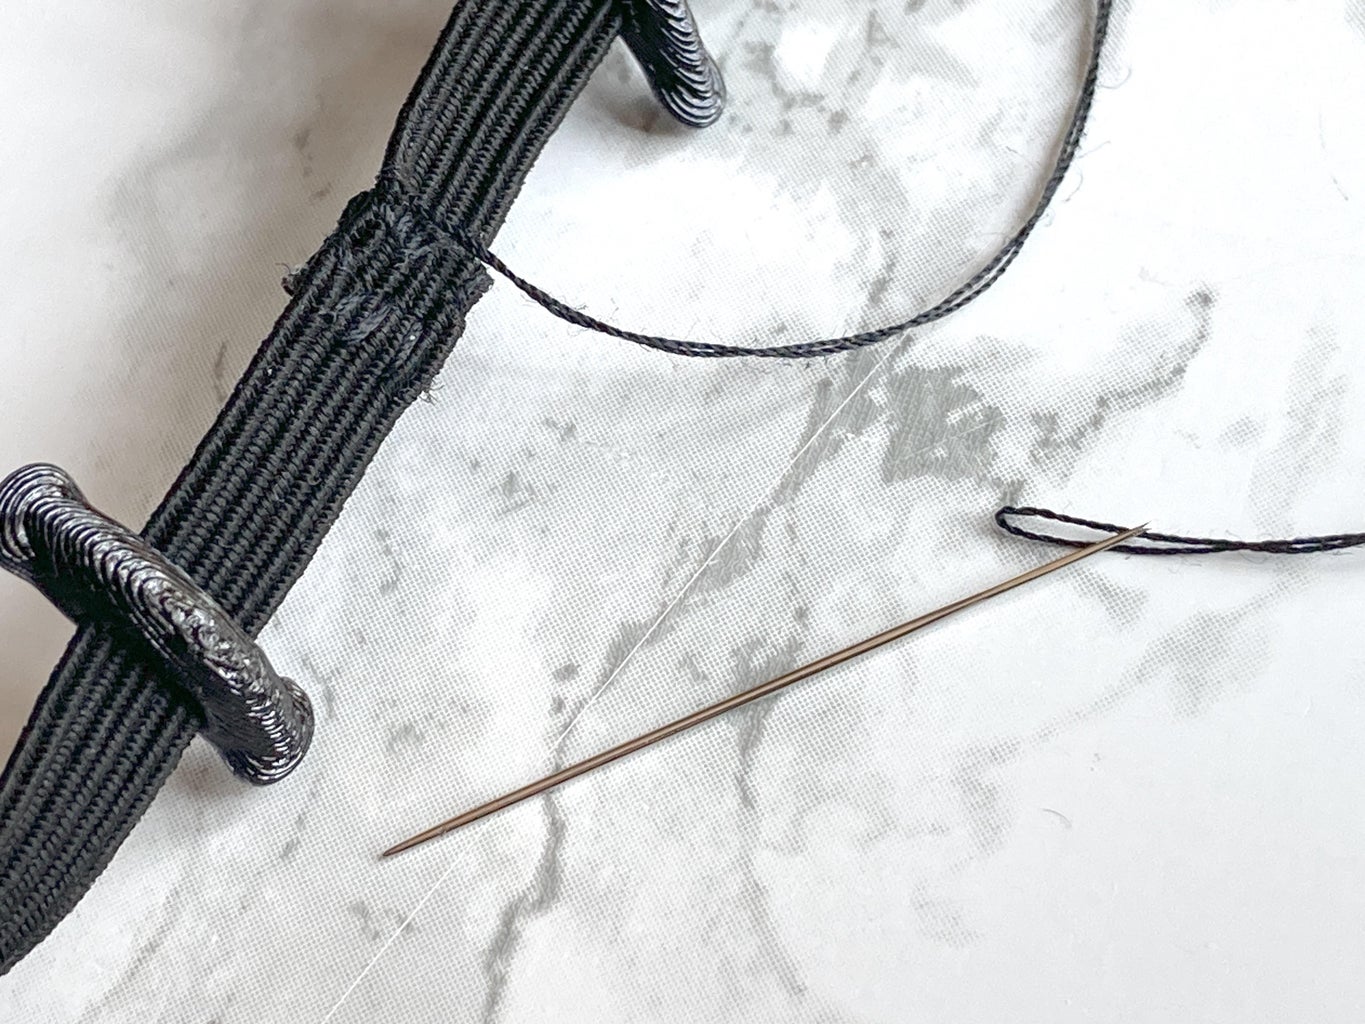
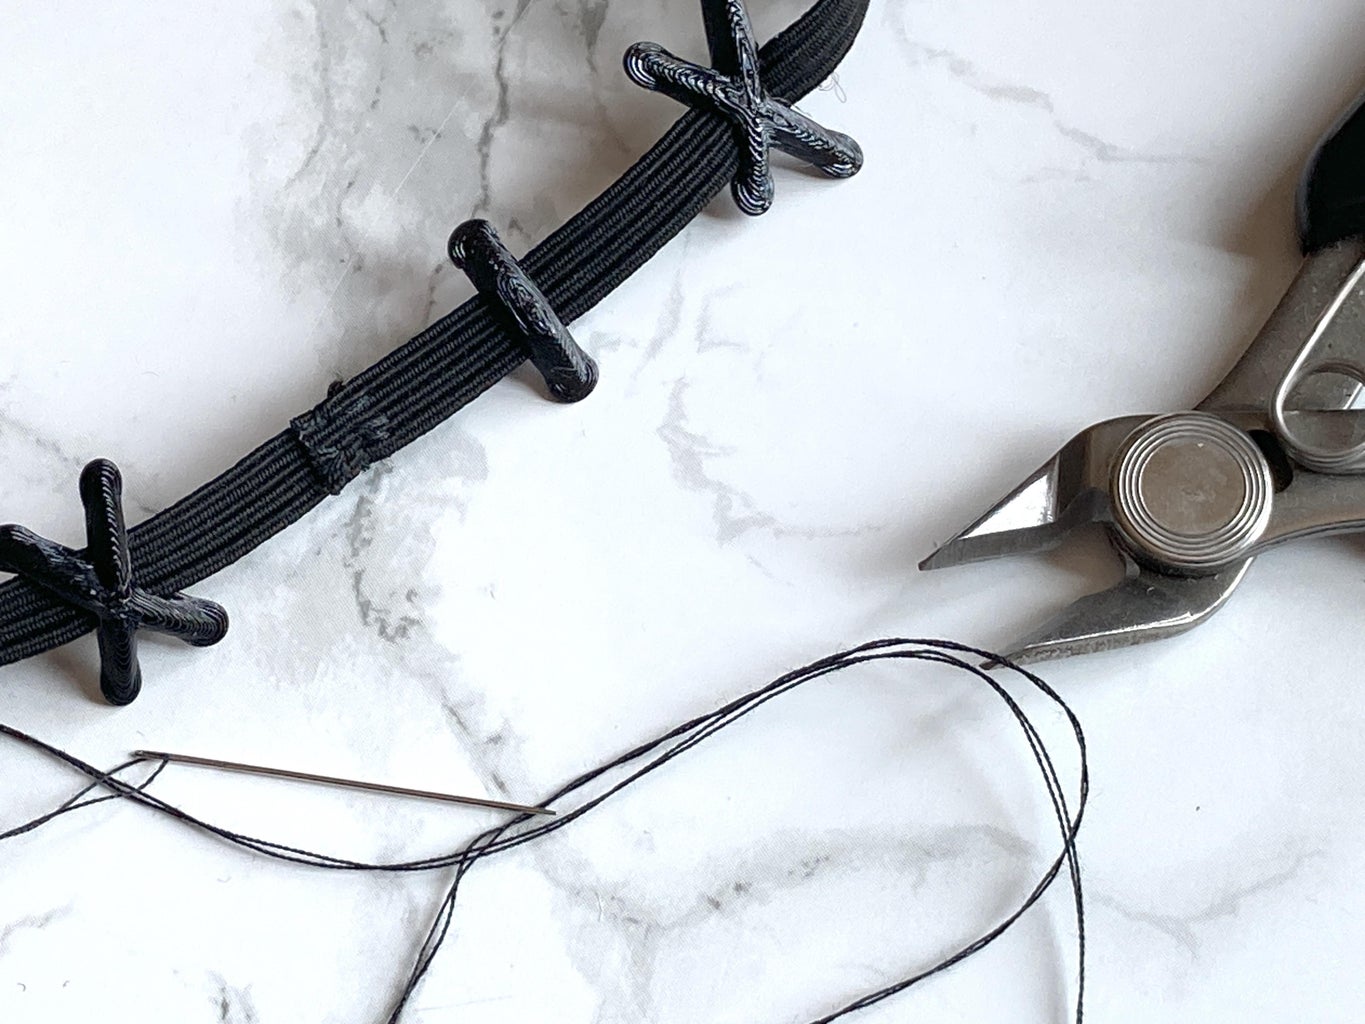
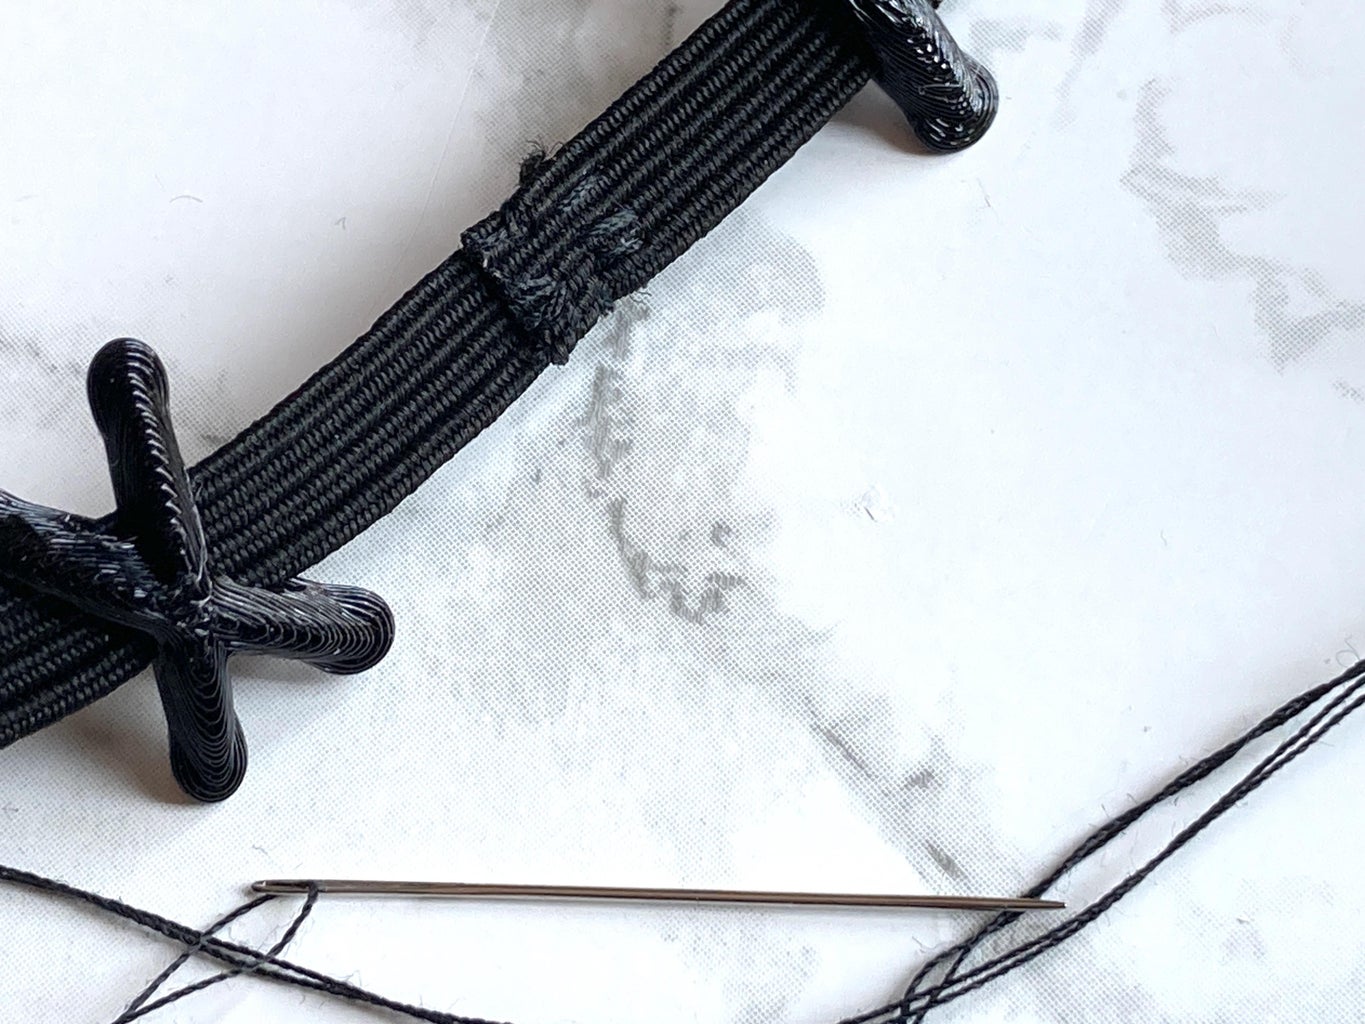
In the past, I've tried gluing elastic together and while it works, I didn't find it worked well. So, I sew these closed.
I overlap the ends about 1/4" which cuts the size down by another 1/4".
Sew it well so it won't come apart. I would stretch the seam before being done to make sure I'm happy with how well it is sewn. I also liked to double over the thread to try to give extra strength.
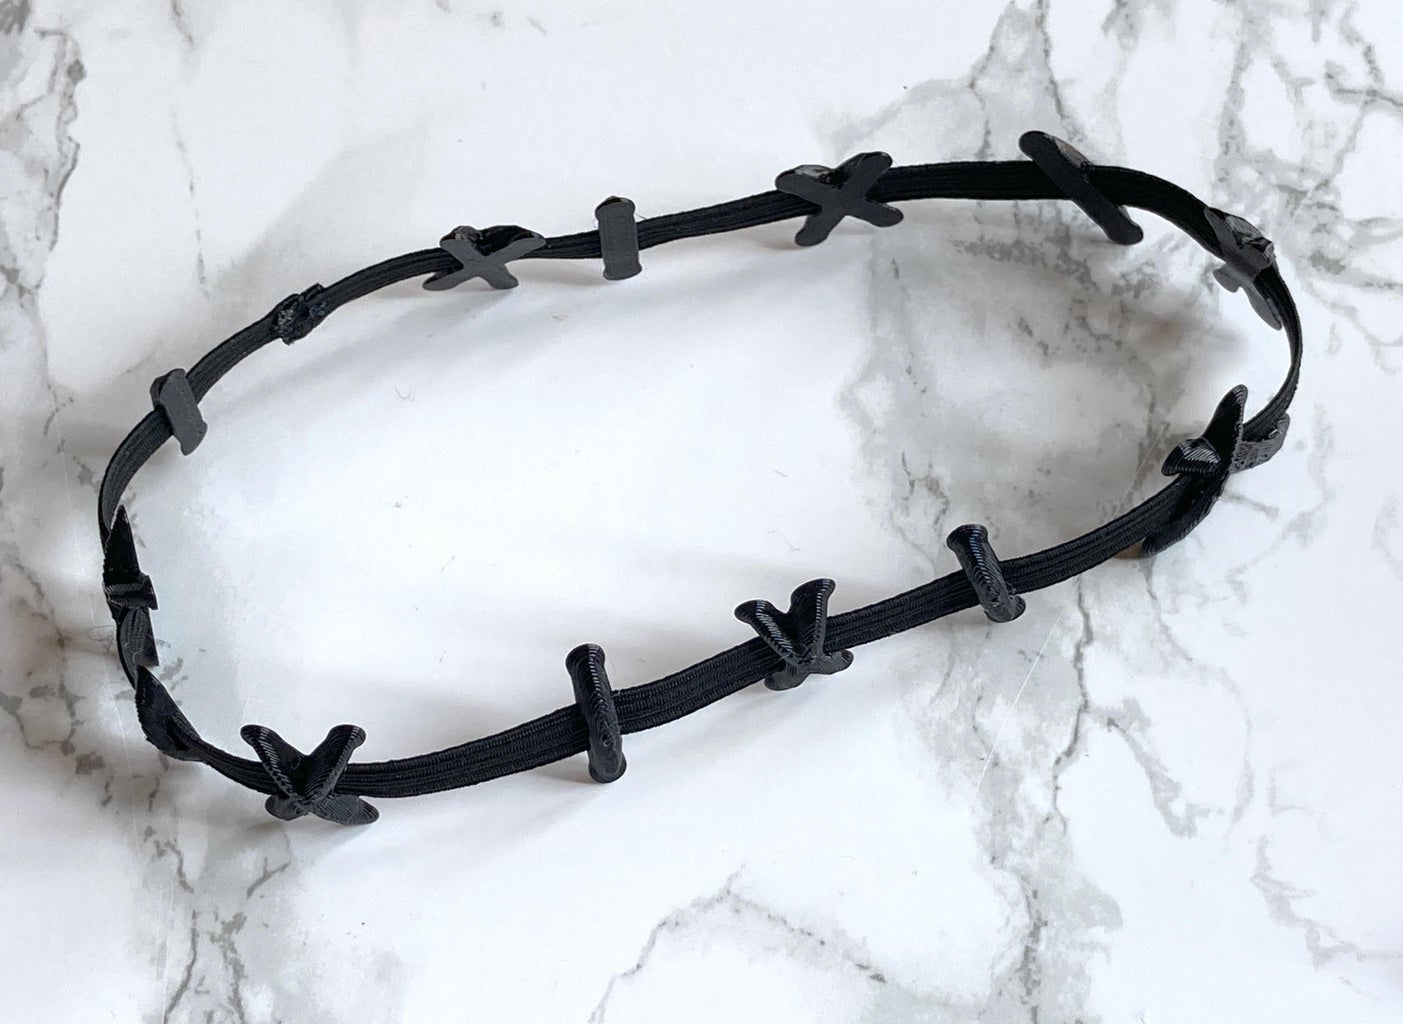
Step 6: Finished

Enjoy your pieces!
The stitches move well but also stay in place well. When you put on your choker, the stitches tend to move, but it's easy to organize it the way you want and they'll stay in place well while you're wearing it.

This is an entry in the
Halloween Contest


13 Comments
10 days ago
This looks cool
14 days ago
The "beads" version is a great idea, and I love that it can be done with kids too. Most project involving 3D printing take ages so it's not for kids, but this one can be pretty quick! Thanks for sharing!
p.s., for what it's worth, I like that you added a video :) a picture is worth 1,000 words, so at 25 FPS...
Thanks :)
Reply 14 days ago
Thanks! And yeah, I try to do videos when I can but it can be hard to get the videos sometimes and then I worry they are hard to follow, but the process comes across better in video than photo.
15 days ago
I like this concept however, since I don't have a 3-D printer and, can't afford one, I'm playing with the idea of using silicone. Perhaps putting silicone into a make-shift plastic pastry bag, Then squeezing the shapes onto wax paper and allowing it to cure overnight. Once cured, I could hot glue it to the elastic. What do you think? Thank you for the inspiration, very nice and clear instructions. And, most important, it looks comfortable. I'm all about it must be comfortable. : D
Reply 14 days ago
You could certainly make a mold and put something into it to make these. You can also use hot glue: https://www.instructables.com/HALLOWEEN-Necklaces-Made-with-Hot-Glue-Dripping-Bl/ This was my inspiration in the first place.
Question 15 days ago
Would love to see a picture of the original 'metal' version used for inspiration.
Please?
Answer 14 days ago
Sorry, I didn't mean to mislead, but the metal is just the jewelry findings not the main necklace itself. The chain and clasp. Some people have a metal allergy and are sensitive to these. I'll update it.
15 days ago
I may have to finally break down and get a 3d printer for this! Thanks for sharing.
Reply 14 days ago
They are so much :)
17 days ago
Nice.
Reply 17 days ago
Thanks :)
18 days ago
Great adaptation!
Reply 18 days ago
Thank you!